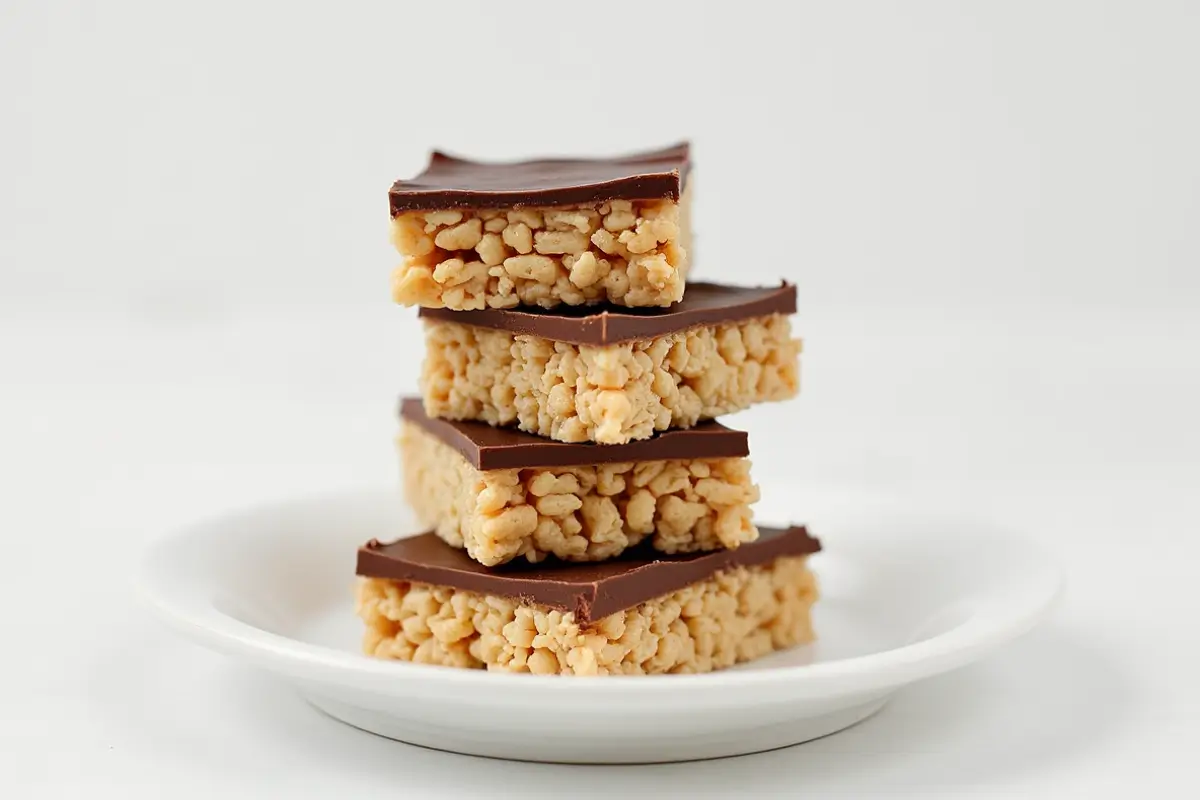
Do you remember the simple joy of childhood treats? That satisfying crunch of a Rice Krispie square, the sweet taste that always seemed to bring a smile? Indeed, let me tell you, that joy doesn’t have to stay in the past. Instead, we’re about to take that nostalgic treat and elevate it into something truly spectacular: a delectable symphony of flavors and textures that will, without a doubt, leave you craving more. Specifically, we’re talking about Peanut Butter Rice Krispies with Chocolate, a no-bake dessert that’s as easy to make as it is delightful to eat.
Whether you’re a seasoned baker or simply a kitchen novice, this is a recipe you’ll come back to again and again. In essence, this isn’t just a treat; it’s a little piece of happiness, ready for you to create. So, get ready to indulge as we dive into everything you need to know to make the perfect Peanut Butter Rice Krispies with Chocolate.
Why Peanut Butter Rice Krispies with Chocolate are a Must-Try
What makes this simple dessert so captivating? Well, it all comes down to the perfect fusion of textures and flavors that dance across your palate. The light, airy crispiness of Rice Krispies forms the ideal base, a canvas for the rich, creamy peanut butter to spread its nutty magic. Then, the chocolate – the decadent finale that ties everything together in a sweet, blissful embrace. This isn’t a complicated recipe, far from it. Rather, it’s about taking simple components and combining them to make a treat that’s both comforting and exciting.
Have you ever noticed how certain tastes can instantly bring back a flood of memories? Peanut butter and chocolate often do this, they evoke feelings of home, comfort and pure satisfaction. Furthermore, when combined with the familiar snap of Rice Krispies, they turn into a dessert that’s both a nostalgic trip down memory lane and an exciting new culinary experience. What’s more, this isn’t just a dessert for kids; it’s a treat that satisfies the inner child in all of us, regardless of age. So, you’re not just making a dessert, you’re crafting a moment of joy, ready to be shared with loved ones, or savored on your own. Therefore, it’s an ideal treat for any occasion, be it a quick evening treat or a planned party.
The Perfect Peanut Butter Rice Krispies with Chocolate Recipe
Alright, let’s get to the part you’ve been waiting for: the recipe that will transform your kitchen into a haven of delicious aromas. The beauty of this recipe lies in its simplicity, and how quick and easy it is. No fancy equipment, no complicated techniques, just a handful of ingredients and the willingness to create some magic. Thus, here’s a detailed walkthrough so that you can whip up a batch of these irresistible treats yourself.
| Ingredient | Quantity | Notes |
| Rice Krispies Cereal | 6 cups | Use original variety for best results. |
| Peanut Butter | 1 cup | Creamy or chunky, depending on preference. |
| Marshmallows | 10 oz (about 40 large) | Miniature marshmallows melt more quickly. |
| Butter | 4 tablespoons | Unsalted is preferred, but salted can work too. |
| Vanilla Extract | 1 teaspoon | Pure vanilla extract is recommended for the best flavor. |
| Chocolate Chips | 1 cup | Milk, semi-sweet, or dark chocolate, as per preference. |
| Optional: Sea salt | A pinch | Enhances the sweet and salty flavor profile. |
Step-by-Step Instructions:
Melting the Butter
- Melt the Butter: In a large saucepan, place the butter over low heat. Subsequently, you want it to melt slowly, ensuring that it doesn’t burn. Once melted, of course, you’ll have the foundation for your dessert.
Combining the Marshmallows and Peanut Butter
- Add the Marshmallows: Tip in the marshmallows and stir continuously until they are completely melted and smooth. This step requires patience. Keep the heat low and use gentle stirring to avoid any burning.
- Stir in the Peanut Butter and Vanilla: Now for the star of our show. Add the peanut butter, stirring until fully combined with the melted marshmallows. Follow it up with the vanilla extract, and continue to stir until you get a smooth, shiny mixture. The fragrance of the peanut butter and vanilla will, undeniably, fill your kitchen, a very promising sign.
Adding the Rice Krispies and Chocolate
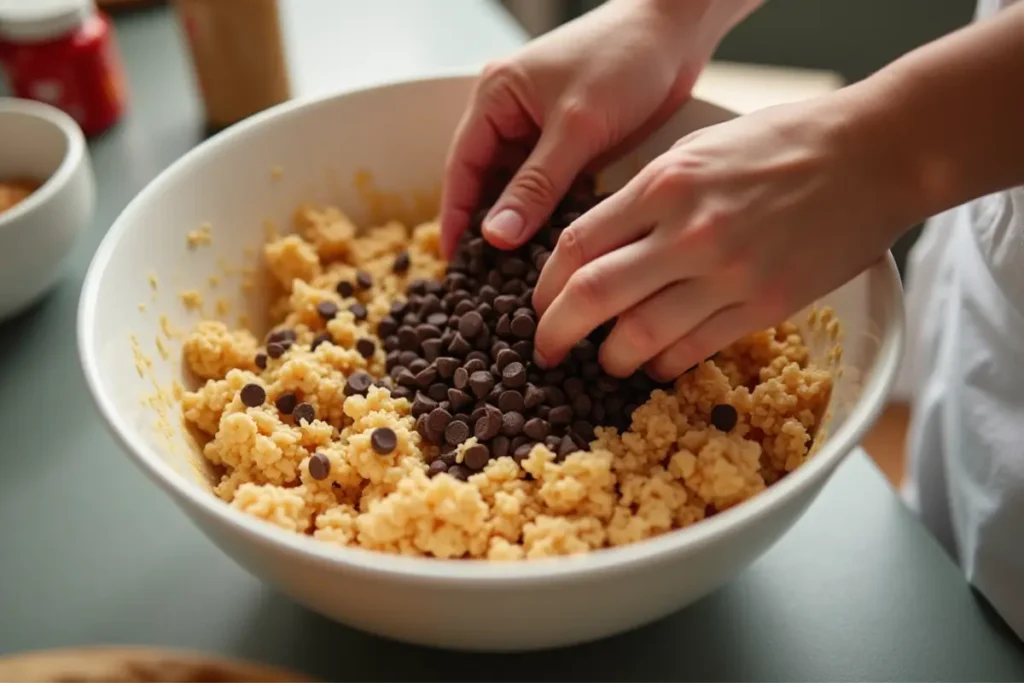
- Mix in the Rice Krispies Cereal: Remove the saucepan from the heat and quickly add the Rice Krispies cereal. Use a spatula or a large spoon to evenly coat the cereal with the marshmallow-peanut butter mixture. This step is vital for ensuring that each piece of cereal is covered, creating a cohesive and delicious treat.
- Fold in the Chocolate Chips: Once the cereal is fully coated, quickly fold in the chocolate chips. Accordingly, you will want to do this while the mixture is still warm; it’ll help the chocolate to slightly melt and create little chocolate pockets. Don’t over mix; just enough to evenly distribute the chocolate.
Setting and Serving
- Prepare the Pan: Take a 9×13 inch baking pan or a similar sized pan and grease it lightly, or you could line it with parchment paper. This ensures that the treats won’t stick to the pan and can, therefore, be easily removed after cooling.
- Press the Mixture: Transfer the mixture into the prepared pan. Use a greased spatula, or the back of a greased spoon, to press the mixture evenly into the pan. You want a firm, consistent layer for the best final product.
- Let Cool: Let the treats cool in the pan for at least 30 to 45 minutes or until set.
- Cut and Serve: Once completely cool, cut the mixture into squares and serve. Optionally, you can also, of course, sprinkle a pinch of sea salt over them if you desire.
Tips for the Best Peanut Butter Rice Krispies with Chocolate
Making these treats is straightforward, but a few secrets can elevate your creation from good to unforgettable. Let’s go through the tips and tricks so your peanut butter Rice Krispies with chocolate will always be on point.
Preventing Sticking
Nothing is worse than spending your time crafting these delicious treats, only to struggle to remove them from the pan. Therefore, to avoid the sticky disaster you’ll want to make sure you’re well-prepared to prevent any sticking:
- Grease the Pan: As mentioned in the recipe, greasing your pan is essential. Use butter, a cooking spray, or line with parchment paper for the best results. The parchment paper will also make removing the treats after cooling a lot easier.
- Grease Your Utensils: While working, it’s a great idea to lightly grease your spatula or spoon. This will prevent the sticky marshmallow mixture from clinging to your tools, making the mixing process more convenient.
Achieving the Right Texture
The perfect texture is the balance of crispy, chewy and melt-in-your-mouth. To get it just right you should pay attention to the details:
- Low and Slow: When melting the marshmallows, keep the heat low. Otherwise, if the marshmallows are burnt, it will make your mixture hard and the treats tough. Don’t rush the process; low and slow is your best friend.
- Quick Action: Once the marshmallows are melted, you’ll want to work quickly. The faster you mix the cereal and spread the mixture in the pan, the chewier and more tender the treats will be. Conversely, if you linger for too long, the marshmallows start to harden.
- Melting the chocolate chips: Do not melt chocolate chips with the other ingredients. Fold them in after the pan is removed from the heat. If you want a smoother chocolate, melt them in the microwave with 1 tablespoon of butter for 30 seconds interval and stir between interval. Let cool before drizzling on the bars.
Variations and Customization
Now, let’s get creative. This recipe is fantastic on its own, but sometimes it’s fun to personalize it. Don’t be afraid to experiment:
- Nutty Additions: For added texture, you could chop and fold in toasted nuts. Think about almonds, walnuts, or pecans.
- Different Chocolate Flavors: Don’t limit yourself to milk chocolate. Feel free to use semi-sweet, dark chocolate, or white chocolate. You can even mix and match!
- Peanut Butter Variety: There is a range of peanut butters available. You could try ones infused with honey, maple, or even dark chocolate. The possibilities are endless.
- Drizzles: Melt some white or dark chocolate, and drizzle it over the treats for an elegant finish. You can get even more creative with melted caramel or a flavored glaze, too.
Healthier Alternatives to Peanut Butter Rice Krispies with Chocolate
Okay, so we know these treats are indulgent. But what if you wanted to make them slightly healthier without compromising their essence? Here are some simple alterations you can consider:
- Sweetener Swap: Substitute some of the sugar with natural sweeteners like honey or maple syrup. However, you won’t want to replace it completely but you can use it to reduce the overall sugar content.
- Low Sugar Marshmallows: Look for low-sugar marshmallows, or reduce the amount that you use in the recipe. This would considerably reduce the sugar without affecting the flavor.
- Dark Chocolate: When it comes to chocolate, opting for a darker choice with a higher percentage of cocoa is the way to go. It has more antioxidants and is less sugary than milk chocolate.
- Natural Peanut Butter: Choose natural peanut butter that does not contain added sugar, salt or oil. Furthermore, this will not only be healthier but allow you to have more control over the amount of sweetness in your treats.
These are very straightforward alternatives and you can apply as many or as little as you desire. The goal is to make the treat just as delightful, but with ingredients that are a touch better.
Storing and Serving Your Peanut Butter Rice Krispies with Chocolate
You have prepared a batch of these amazing treats, now you need to know the best way to store them and serve them so they remain in good condition. Here is what you need to know:
- Ideal Storage: For storing, place your treats in an airtight container. You’ll want to ensure they don’t get exposed to air to keep them fresh. Also, if you live in a hot climate, it’s better to keep them in the fridge to stop them from melting.
- Shelf Life: If stored properly, these treats can be kept for about 3–5 days. Still, they’re so delicious that they might not last that long.
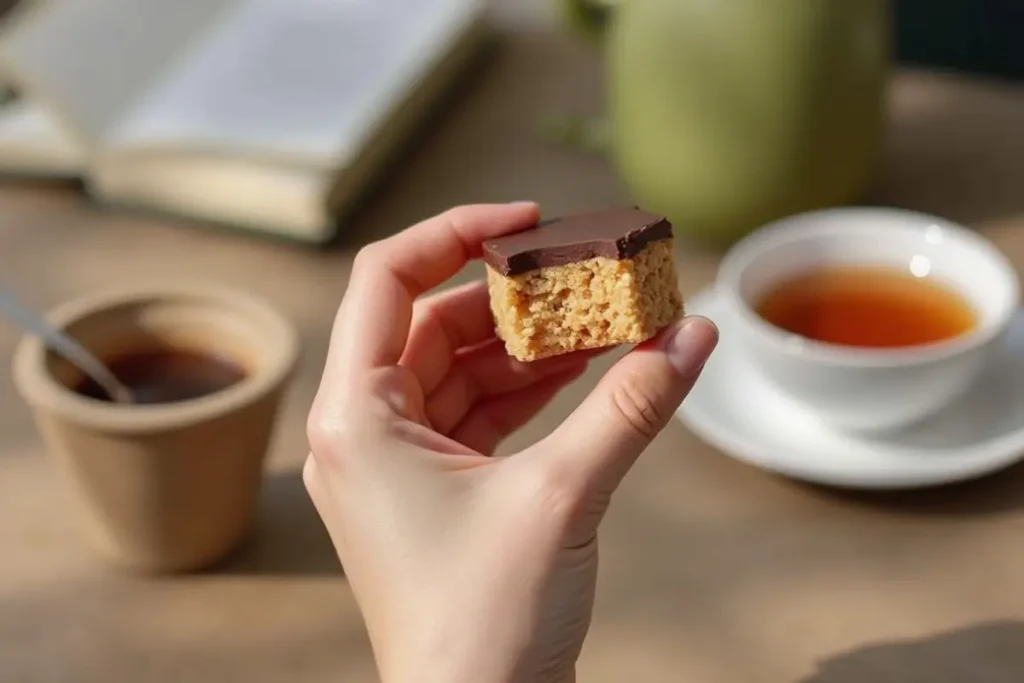
- Serving Suggestions: These treats are amazing on their own, but you can serve them with a cold glass of milk or a cup of warm tea. Besides, you could even serve them with ice cream or other desserts for a decadent experience.
- Gift Ideas: These treats make a wonderful gift. Wrap them individually in cellophane bags tied with a ribbon. They are perfect for parties, potlucks, or as a gesture of love to a friend.
What Sides Go With Peanut Butter Rice Krispies with Chocolate?
Peanut butter rice Krispies with chocolate offer a delightful combination of nutty and sweet flavors with a crunchy texture. To make these treats even more enjoyable, pairing them with complementary sides can enhance their appeal. Here are some fantastic pairing ideas:
1. Fresh Fruits
To begin with, fresh fruits like strawberries, raspberries, or banana slices pair beautifully with the rich flavors of peanut butter and chocolate. Their natural sweetness and juiciness balance the decadence of these treats.
2. Ice Cream
Another excellent pairing is a scoop of creamy vanilla or peanut butter swirl ice cream. The cold, smooth texture complements the crispy and rich treats. For a dessert spread, you can also explore the Brookie Recipe, which adds an indulgent chocolatey contrast.
3. Cottage Cheese Cookie Dough
If you’re looking for a high-protein side dish, try the Cottage Cheese Cookie Dough. Its creamy and slightly tangy flavor balances the sweetness of the Krispie treats while offering a unique texture.
Bonus: Recipe Inspiration
If you’d like to try a different version of this treat, check out the Peanut Butter Rice Crispy Treats Recipe for a classic base that can be easily modified with chocolate additions.
FAQ About Peanut Butter Rice Krispies with Chocolate
You probably have some lingering questions, so let’s address the most common ones so that you can make these treats with full confidence.
- Can I make these with other nut butters?
- Absolutely! Almond butter, or cashew butter, are great alternatives. Feel free to experiment with different nut butters for a fun flavor change.
- How can I prevent the Peanut Butter Rice Krispies with Chocolate from becoming too hard?
- Do not overcook the marshmallows, use fresh marshmallows, and keep the heat low. Also, adding an extra tablespoon of butter can help keep them soft and chewy.
- Can I freeze these?
- Yes, you can freeze them for longer storage. Wrap them tightly in freezer-safe plastic wrap and let them thaw at room temperature before serving. For best results, try consuming them within two months of freezing.
Conclusion
So, there you have it: your complete guide to creating the most delectable Peanut Butter Rice Krispies with Chocolate. From a simple childhood treat to a sophisticated, customizable dessert, this recipe is ready to become a staple in your kitchen. Certainly, we’ve covered everything from the perfect recipe to tips and tricks and healthier alternatives. The best part is that these treats are not just delicious, they’re also simple, and you can have them ready in no time. Remember to make this treat your own, experiment with flavors, and try out different variations. And most importantly, enjoy each bite!
Now, it’s your turn to head into the kitchen and make a batch of these irresistible treats. Whether it is for your family, your friends, or just for yourself you will not be disappointed. Then, share your creations with us, and tell us all about your experiences in the comments section. Happy baking, and remember, the kitchen is a place for joy and creativity. Go and make some magic!